Before you begin
This appliance like all gas appliances requires
regular servicing to maintain optimum performance. Bosch recommends
that these appliances be serviced at intervals not greater than
2 years
Tools Required:
-
Digital Manometer
-
Philips Head Screwdriver
-
Torx 25 Screwdriver
About this task
Servicing the appliance includes lubricating moving
parts, replacing o-rings and seal and generally ensuring the system
is working to specification. The following steps demonstrate the
process of servicing the CI unit to ensure it is giving optimum
performance.
Procedure
- Isolate the water and gas to the appliance at
the valves directly below the unit.
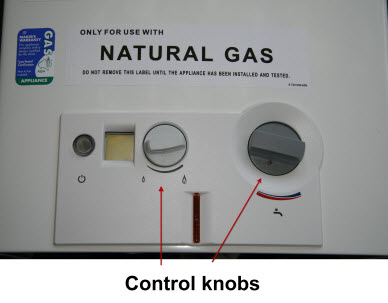
- Remove both gas and water control knobs from the front
of appliance
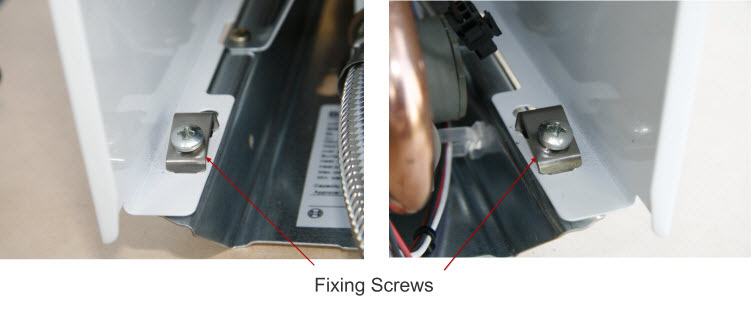
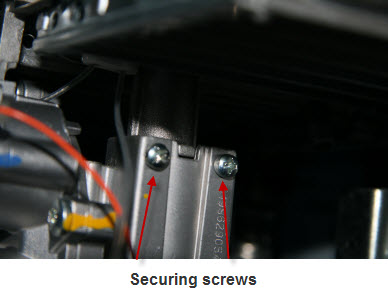
- Remove 2 fixing screws from underside of appliance and
ease front cover forward to allow it to lift off top brackets.
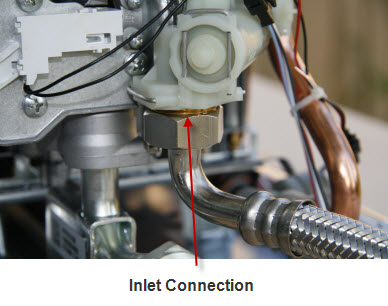
- Release water pressure from appliance at a hot water
fixture, and disconnect the flexible inlet connection.
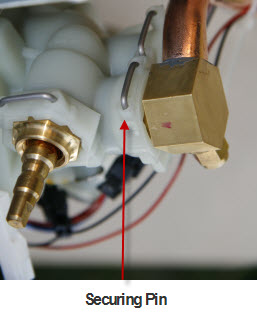
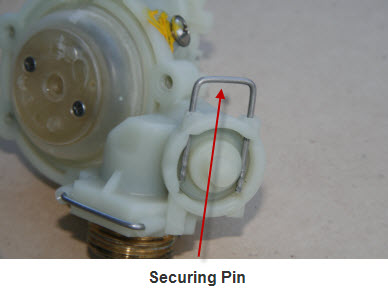
- Remove securing pin from outlet to water valve and ease
outlet pipe away from water valve to allow removal of complete water
section.
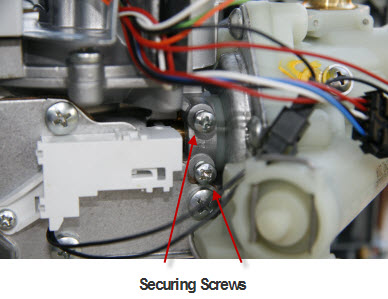
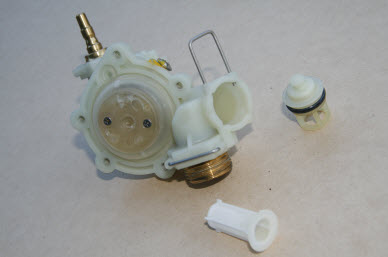
- Loosen securing screws on underside of gas valve (pictured
below) to allow removal of water section.
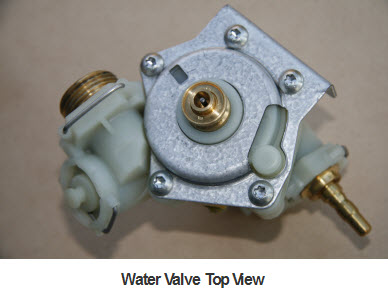
- Ease water valve away from gas valve, this will allow
the water valve to be dismantled for service
- With water valve removed from the heater , remove the
5 Torx T25 screws from top of water valve to allow access to diaphragm
and push rod.
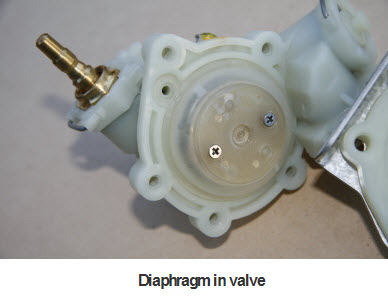
- Remove securing plate and top of water valve and inspect
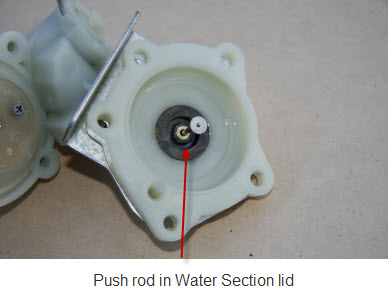
diaphragm and replace if necessary. Remove push rod from top of
water valve and apply grease.
| Note |
The top of the
water valve is sealed and has no serviceable parts. If the water
valve is showing signs of leakage, replace the top of the water
valve (P/N: 8705500105)
|
- Remove securing pin from lower connection on water valve
and remove plug to allow access to water filter. Remove and clean
or replace the filter if necessary.
- Re-assemble water valve but do not reinstall yet.
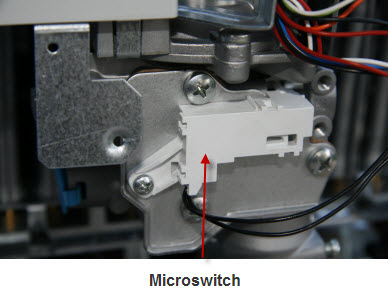
- Before any attempt is made to service the gas section,
remove the self adjusting microswitch from the underside of the
gas section by removing the single fixing screw and sliding off
spindle of gas section.(IMPORTANT: microswitch will be damaged if
this procedure is not followed)
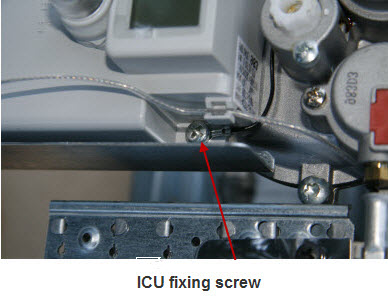
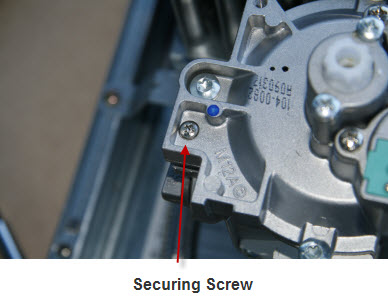
- Remove the single ICU fixing screw to allow the ICU and
ICU heat shield to be removed to gain access to the gas valve cap
securing screw.
- Remove the securing screw to allow removal of the gas
valve cap.
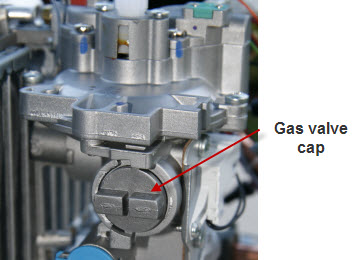
- Remove the gas valve cap by turning anti-clockwise and
easing the cap away from gas valve body - Caution - the cap has
a spring behind it
- Remove spring and poppet valve from unit to allow access
to gas spindle. Remove gas valve from appliance and grease as required.
(Note: Gas Valve cannot be removed unless microswitch has been removed)
- Reassemble gas valve fitting ignition microswitch last
ensuring it is locked into correct position
- Water valve can now be attached to the gas section
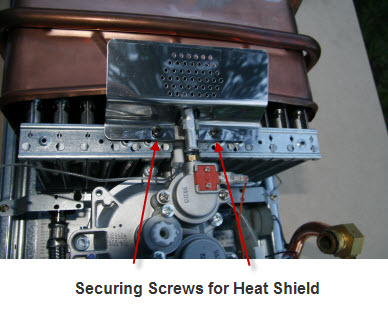
- Remove pilot burner by removing screws either side of
pilot tube. Remove heat shield from pilot burner and lift pilot
burner away from gas valve and disconnect ignition and flame sensor
wiring. Pilot burner can now be cleaned. Remove pilot injector and
clean or replace injector as necessary.
- To clean burner, loosen the two securing screws from
gas valve and two screws from the rear of the burner and ease burner
upwards releasing from gas valve and inspect 'O' ring for damage, replace
if necessary.
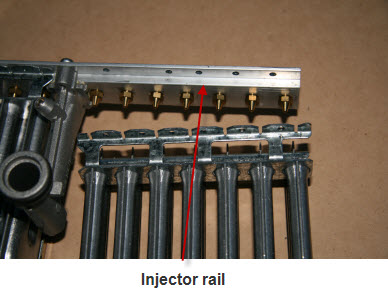
- Remove 8 screws from the rear of burner assembly and
seperate the burner bars from the injector rail and clean with compressed
air or water. Reassemble burner, refit to gas valve and attach the pilot
burner to the main burner assembly
- Refit Gas Valve/Water Valve assembly to appliance and
attach the inlet hose to water valve
- Turn on water supply to appliance and visually check
for leaks. Turn on gas supply to appliance and check with soapy
water for gas leaks
- Recommission the appliance as per instructions
Results
After servicing/repair, the hot water unit will require
re-commissioning to ensure it is operating to specification.